

In the last week we already had the first part the frame building story from the current Cyclist. Today the frame is soldered and given the finishing touches.
The cleanliness trick
Mitering the tubes, i.e. adjusting the tube ends so that they fit together, sounds easy. Measure, mark and file the pipe. 15 minutes later Pete delights me with a story about a student who "used the file with only one hand like it was a sword!". I realize I made the same mistake and ask Pete about the correct technique. Lo and behold, within just a few minutes, the end of the pipe has an even curve. Lesson learned.
So after the seat tube is mitered, Pete explains to me that cleanliness is key to the strength of a brazed joint. Any surface contamination can disrupt the flow of the brass. And if oxidation occurs during heating, it leads to soot precipitation "which reacts with the brass and results in a weak bond." Sandblasting eliminates the first problem, smearing both parts with flux eliminates the latter.

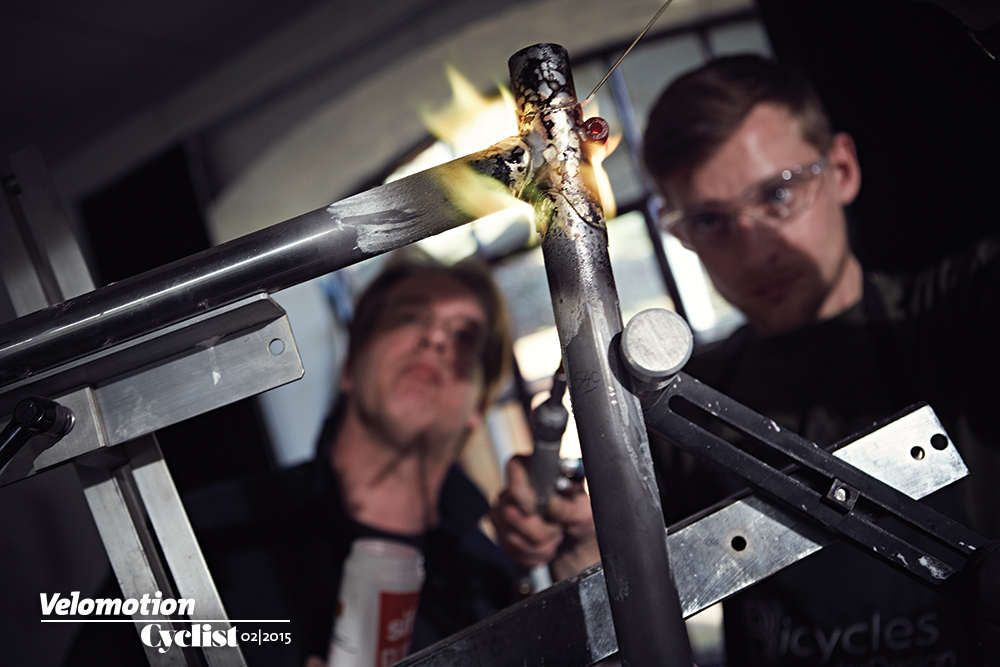
"A flux basically cleans the surface and improves the brass flow," Pete tells me. "Remember, you can never have too much flux! You will also notice that the flux changes from orange to glassy at a certain temperature. Well, shall we then?” At first I am very timid and uncoordinated. It feels strange to hold the bulky soldering torch in one hand and the thin stick of solder in the other. But after initial help from Pete, who made small circular motions with my blowtorch hand to evenly distribute the heat, I got the hang of it.
"It's a bit like trying to stand on one leg while patting your head while rubbing your stomach," he laughs. Now it's time to turn off the soldering torch and Pete tells me that I've gotten a half decent result. A quick stop at the sandblaster to clean up excess flux and brass follows, and I'm starting to think I might be a pretty good frame builder.
The next two days in the workshop are amusing and frustrating in equal measure. I connect the fork dropouts to the fork blades and the steerer to the fork crown with relative ease (although the latter needs some sandblasting to shed the Forged in the Fires of Mordor look that has become my trademark). Further tubes will be clamped into the frame gauge shortly.

In the beginning it's just the seat tube, bottom bracket shell and head tube, but soon both the top and down tubes are added, which have previously been mitered accordingly. On Wednesday afternoon, the front triangle including the saddle and head tube sockets are clamped and ready to be soldered. Soldering the front triangle is a tedious process with three locations to be soldered in a row. I dance around the jig, trying to follow Pete's directions while not burning him as he rotates the frame to get to the next joint. More than once a hand appears, pulling mine away from a spot so I don't overheat it, or returning it to one where the brass hasn't melted enough. But after 45 minutes the workshop curtains open and a – at least in my eyes – perfect front triangle gleams in the sun.
On the finishing line
Thursday is the changing of the guard and Rob takes over. He seems happy with my progress and over the next two days we're tackling the rear triangle. The dropouts connect to the chainstays and everything runs smoothly. But then we meet the first obstacle. “Look at the design, the chainstays are supposed to be 420mm, right?” asks Rob. "I think you took too much away." Of course, pride comes before the 4mm drop and I filed down to 416mm. Luckily, Rob gives the all-clear. Unlike any other tube, such as the top tube, this error is not quite as wild here. Once the other chainstay is adjusted, we'll position both of them.
 “We just attach the struts with a bit of solder. This makes them easier to move around when aligning the frame than when the points are already completely soldered together,” explains Rob. And it comes as it must. When we hold a test wheel in the dropouts, it quickly becomes clear that the rear end is shifted 2 mm to the right. Not too much, one might think, but Rob isn't satisfied.
"Two millimeters of tolerance might be good enough for mass-produced frames, but we can do better than that." With a little pull and push, we get the chainstays straight. Then it's time for the final piece of the puzzle: the seatstays.
Until now, everything has been socket connections that have been brazed with brass. However, since the seatstays should rest against the seat tube from behind, there are no sleeves. This means that the upper ends must first be mitered to a hair's breadth and then soldered socketless. Rob explains to me that sleeveless soldering is a lot more difficult, which is why I'm just a spectator for the first time this week.
For years I've been wondering if one day I won't even be able to become a second Ernesto Colnago. But Rob's work—applying the silver solder to the struts like an artist applies paint to the canvas with a brush—is answer enough for me. Except for a few cable guides and cable stops, the frame is complete. However, I realize how much of a share of Pete and Rob's experience is, and how little of a frame builder I am.

But despite their advice - of which there was plenty - I feel good that I built this frame. Tailor-made, unique and beautiful in my eyes. This is definitely a dream come true and something to be proud of. So where is the nearest coffee shop?
The finishing
This gives the frame that certain something. "The finish is what really defines your bike," says Stuart Harris of Ooey Custom Paint. After a brief description of what I want my frame to look like - "Mhh, I like orange!" - I receive a draft via email. A few small changes later, my homemade frame is ready to be painted. You have to reckon with up to two weeks before you get your good piece back.
Of course, the complexity of the design also plays a role. Cyclist has decided on some lettering. Before painting, the frame needs to be sandblasted, then primed and etched (a measure to prevent rust) which ensures the finish will be pristine and durable. Since our design was relatively simple, the whole thing only took about a week. The price, on the other hand, was a bit more complex, the paint job cost us €470. Sure, not exactly cheap, but definitely worth it for a unique look.


Leave a Comment