

Spectrum: After we met yesterday in the ersten Teil our winter check with the tires, today we continue with our winter check. We will look at the most common brakes on German city bikes and say a few words about maintenance, repair and adjustment.
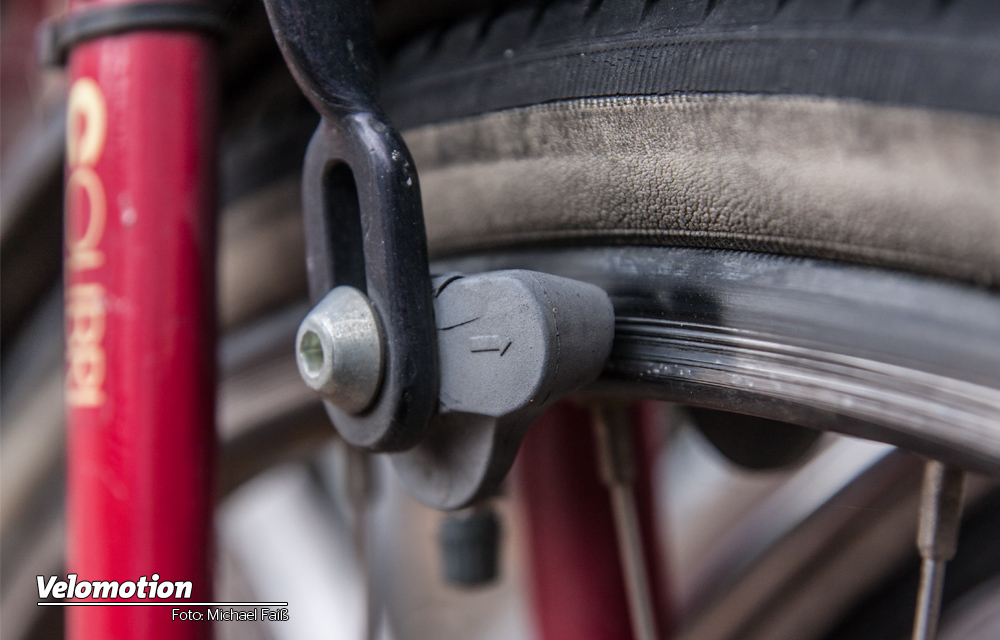
The many different brakes that can be found on city bikes are problematic - it would go beyond the scope to go into each one here, so we limit ourselves to the most common type: the so-called V-brakes (right in the picture). In order to achieve sufficient braking performance, three things are particularly important: the pads, the alignment or tensile stress. In most cases, these things can be optimized quite easily and quickly - but if you don't dare to do this, it's better to go to a specialist workshop, because the brake is definitely the wrong component to dare to experiment with. In addition, you should make sure right at the beginning that the brake cables and cases are still in order. If the brake cable has already started to rust, is frayed or gets stuck in the sleeve more often, it should be replaced. Instructions can be found in the service instructions for the brakes - the same applies here: if in doubt, it's better to see a professional.

coverings
First you should take a closer look at the brake pads. Above all, of course, they should be thick enough and, if possible, not dried out or even porous. Old, porous coverings lose a large part of their braking power, especially when they are wet, and represent a safety risk that should not be underestimated - not only in winter. If you need new pads, you should definitely take the old ones to the dealer. This is how you prevent a bad purchase. We cannot give specific tips on the subject of brake pads, as there are a large number of different manufacturers and products. As with the tyres, the same applies here: You shouldn't necessarily buy the cheapest pads - especially in the wet there are considerable differences in braking performance. The best thing to do is get advice from a well-stocked specialist shop. When installing the new pads, it is important to ensure that they lie as flat as possible on the braking surface of the rim and do not rub against the tyre.

Orientation
The old saying applies to the correct alignment of a V-brake: All roads lead to Rome. In order to align the brake correctly, it is first important to understand how it works: Put simply, the brake pads move towards the rim as the tension increases. The cable itself is clamped to one arm of the brake with a screw. In addition, you can adjust the tension on most brake levers with a wheel on the cable outlet. The further you turn the wheel outwards, the higher the tension.
Now we come to the actual alignment:
 1) First you should turn the dial all the way in, to the lowest tension. From this starting position, turn the wheel outwards again by 3-4mm.
2) Now loosen the clamping screw on the brake. Care should be taken here, especially with older and less well-maintained bikes. It is better to work with feeling than with force - if the screw breaks, you are faced with a problem.
 3) When the cable is free, press both brake arms together so that the pads lightly touch the braking surface and screw the cable tight again in this position. The wheel should now more or less lock - but don't worry, the trick is yet to come.
4) Now turn back to the brake lever. Here you turn the adjustment screw back in and decrease the cable tension - to the point where the wheel can spin freely again. Complete!
It also doesn't hurt to remove dirt, dirt and deposits from the braking surfaces of the rims. Here you should never work with greasy or greasy substances, because these can reduce the braking performance to zero. It is best to simply clean with warm water and dish soap.
Tomorrow we continue with the third part of our winter check - we dedicate ourselves to the lighting.


Leave a Comment